
This is a follow-up from the post Hacking Smart Light Switches and Other IoT Devices… where I installed Tasmota on a Gosund Smart Light Switch (SW1). I also installed replacement software on the Gosund Smart Dimmer Switch (SW2) and the Youngzuth 2-in-1 Switch, and since the process was pretty unique for each, I thought it might be worthwhile to share my experience.
Using TUYA-CONVERT is preferred since it doesn’t require opening up a device or soldering, but it seems like all newer devices are using software that can’t be hacked wirelessly anymore, so you will likely need to open your smart home device. Now, let’s go void some warranties!
Gosund Smart Dimmer Switch (SW2)
This dimmer switch has a nice capacitive touch panel for changing the lighting level, so it feels a lot like adjusting something on a touch screen. Since Gosund also makes the SW1 switch I started with, I was hopeful it would be similar and I could avoid soldering… not so much.
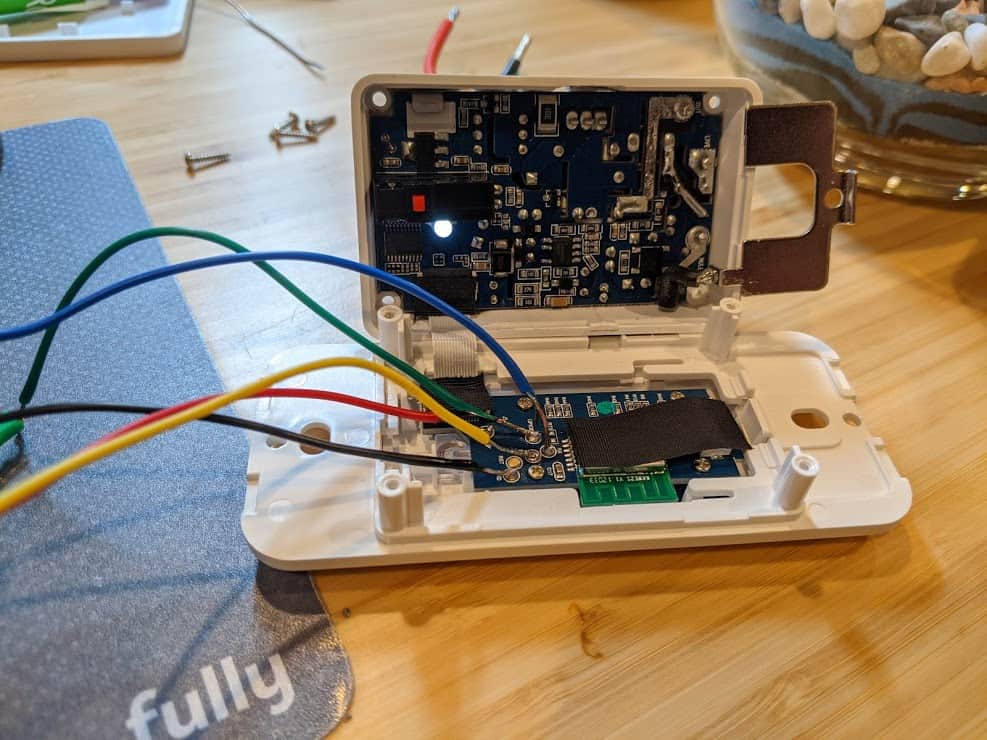
Like the SW1, the SW2 requires a Torx T5 screwdriver to open it. Unlike the SW1, the SW2 dimmer switch has two circuitboards in it, connected by a small cable. Reading about this switch, one person claimed it could not be hacked with that cable connected – this is not true, and I bricked one of these detaching the cable… not recommended. Unfortunately, the serial connections are in the middle of the board, so the process I used with test hook clips would not work like they did on the SW1. However, the connection points are pretty big and well-labeled, so soldering wires to them is pretty easy. Once I had connections, the process was super simple to install new software, exactly like the SW1. It’s nice when things just work!
But, of course, things didn’t just work. When I installed the dimmer the dimming functionality didn’t work from the switch. Looking at the Tasmota template details for the Gosund SW2 Dimmer, this switch requires extra scripting to function properly. However, scripting is not available in the basic Tasmota software, so it needed a different version. Fortunately, once you have Tasmota installed, switching the software is easy and only requires a web browser, selecting “Firmware Upgrade” from the web interface. Unless it isn’t so easy. Trying to install tasmota-scripting.bin from the unofficial releases failed, and first required installing the tasmota-minimal.bin to get the smallest install and then installing the compressed version of the unofficial release, tasmota-scripting.bin.gz (only the .gz version would install successfully). I used the OTA (over the air) install for the minimal software (pointed to the official OTA releases), and manually uploaded the scripting gzipped binary downloaded from unofficial experimental builds. Once installed, there are new menu options in the web interface, “Configuration” -> “Edit Script”, and simply paste and enable the script from the template page. None of this was complicated, but is also wasn’t very obvious… hopefully I can save you some trial and error.
And, the switch works great and immediately worked with Alexa (make sure emulation is set to “Hue Bridge” to enable Alexa to use the dimming functionality.
Youngzuth 2-in-1 Switch

The Youngzuth 2-in-1 Switch is actually two switches that fit into the space of a single switch. When I opened the switch (Phillips head screwdriver) and started looking around the circuitboard, I couldn’t find any connection points for the serial interface. I finally hit the point I had been dreading… needing to solder directly to the chip.
The Youngzuth 2-in-1 uses a TYWE3S package and fortunately a lot of details are available on the Tuya Developer website, so it was pretty easy to figure our the chip connections. I really hate soldering, especially on tiny components next to other tiny components, so I had a margarita to steady my hand.

Once wires were connected, installing the software was a breeze. Configuration was also easy, with an example provided in the Youngzuth 2-in-1 template.
Full disclosure, I have not yet installed the Youngzuth switch, as I made a rookie mistake, not realizing there is no same-feed neutral connection at the switch location. Once installed I will post an update if anything required extra work.
If you have any questions or different experiences with these devices, please leave a reply below!
2 Replies to “More Hacking Smart Home Devices with Tasmota, Youngzuth and Gosund”